How to Subscribe for Ad Manager
Irrespective of the plan selected for Ad Manager reselling, the steps to be taken by your account to subscribe are outlined in the following article.
You can provide the necessary permissions to the team member by going to Settings > Teams > editing the permissions of a specific team member. In the roles and permissions section, there will be an option to enable the checkbox for Ad Manager.
Once done, users can proceed to subscribe to Ad Manager from your account by clicking on the 'Activate Ad Manager' button located under your account ➝ Marketing ➝ Ad Manager tab.

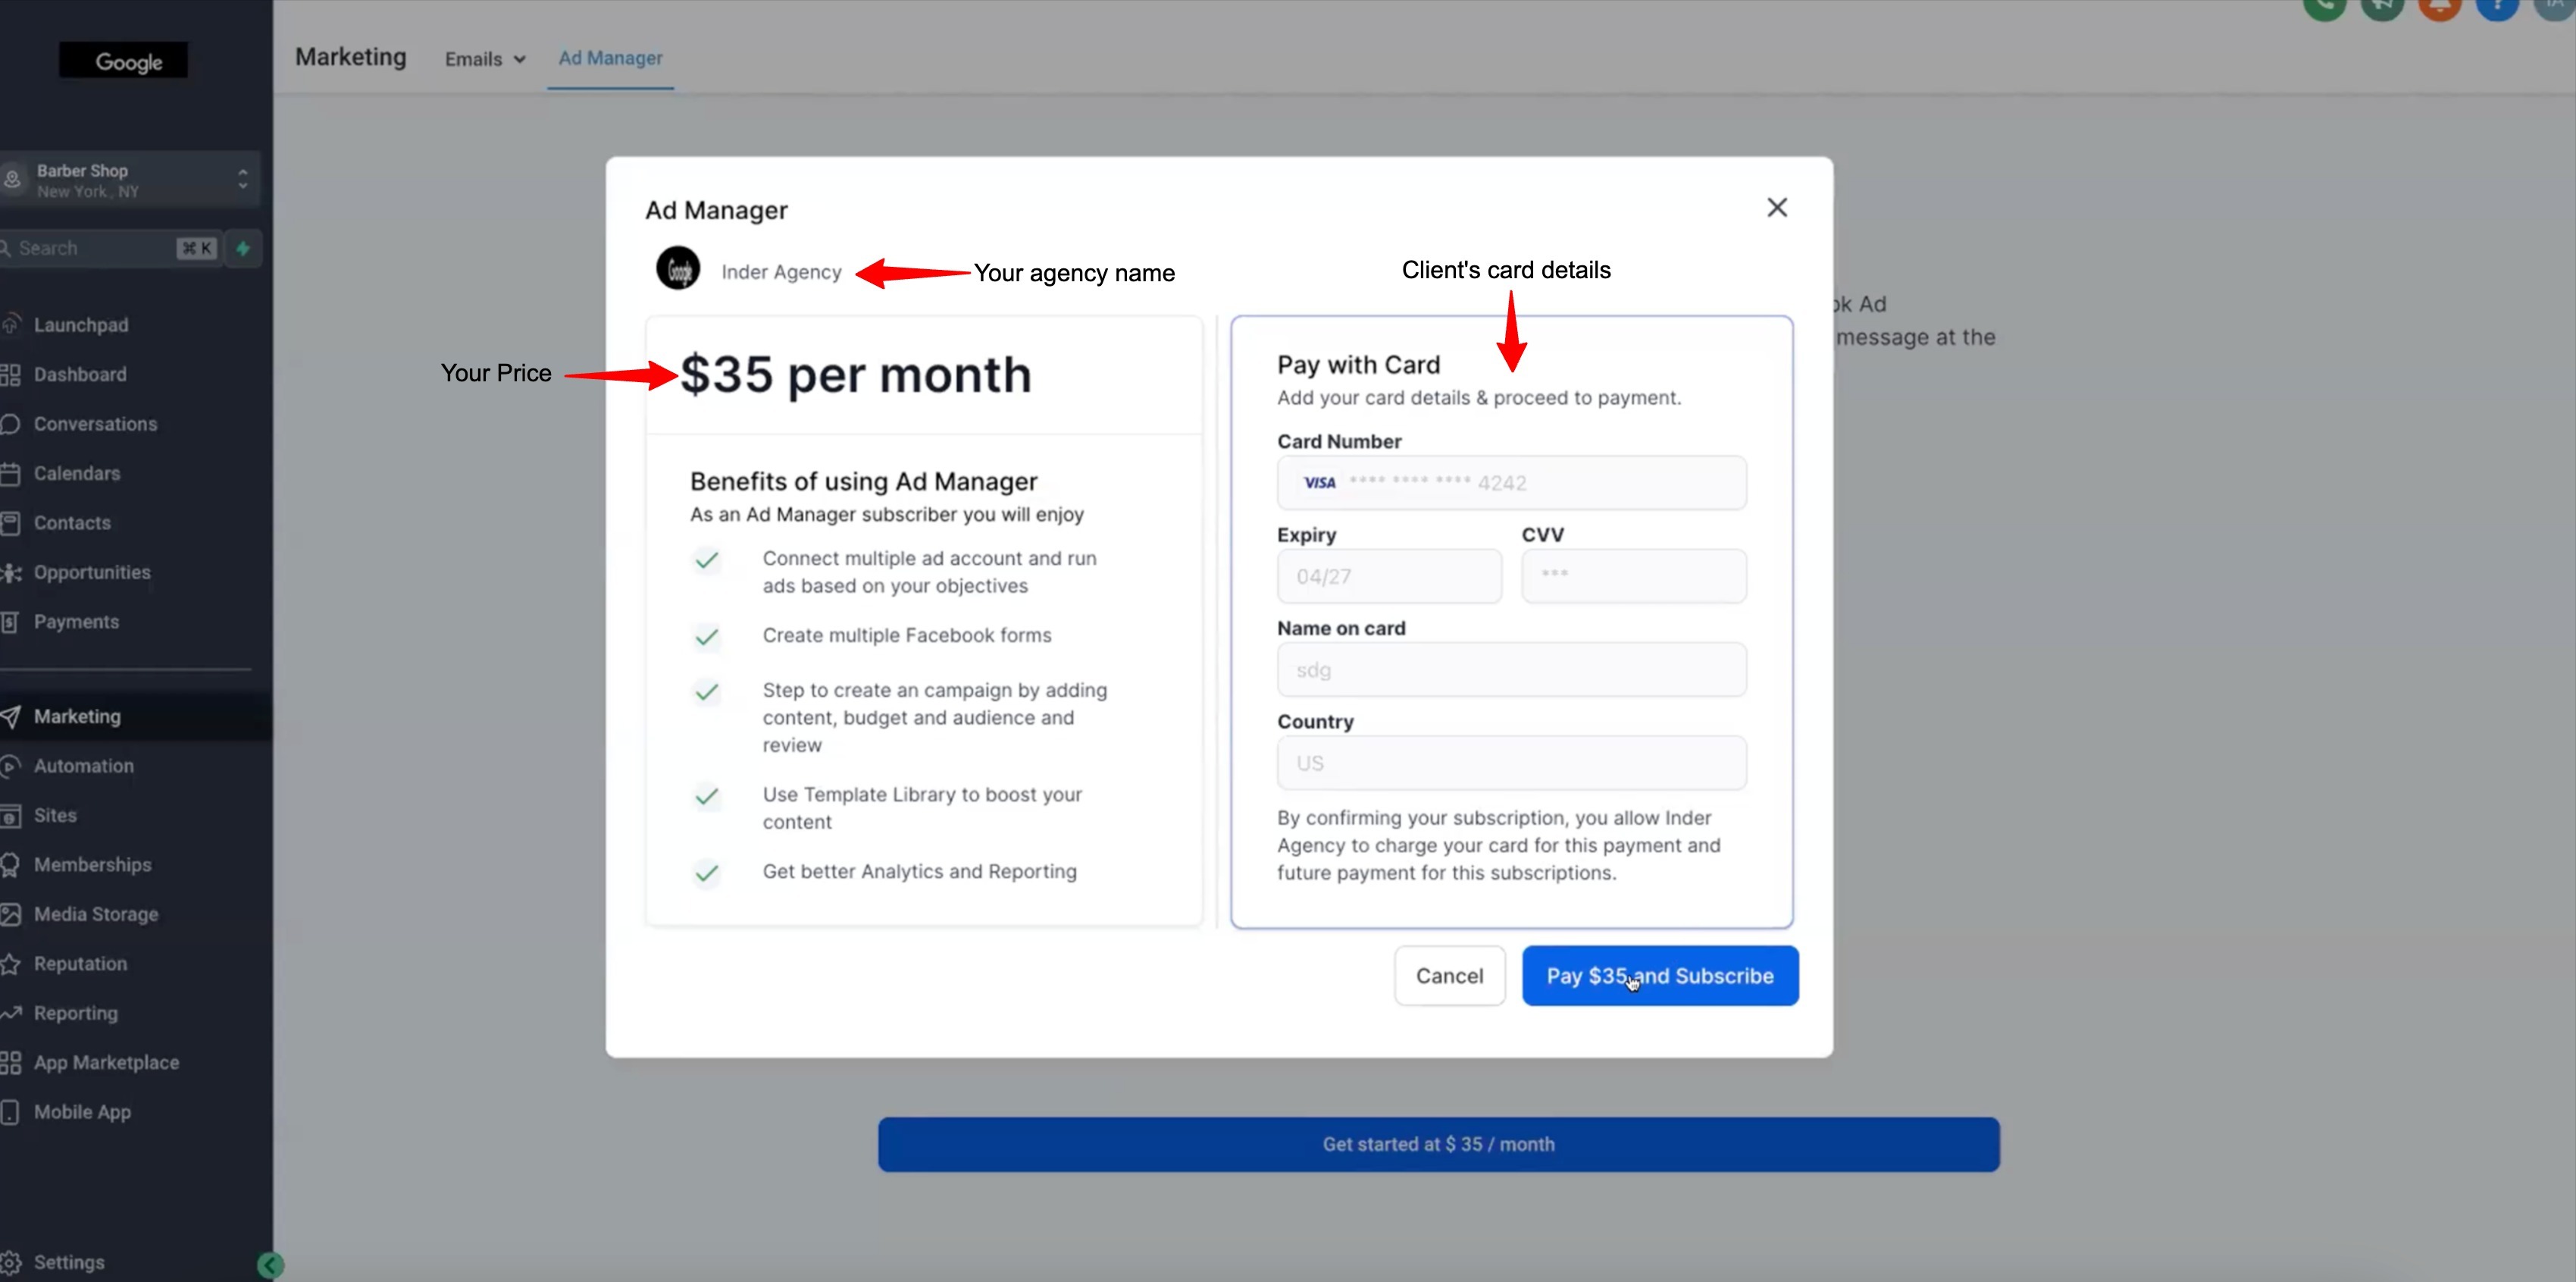
When your client purchases Ad Manager, it creates a subscription in the system, which is between your client's card and your Stripe account, allowing you to collect payment from your clients.
When your client clicks the Pay and Subscribe button, the system will create the subscription, process the payment, and direct them to the Ad Manager onboarding flow.
Note: This is a monthly subscription amount that your account charges from clients to use Ad Manager and publish unlimited campaigns. Payment for the campaign will be charged from the card on file under the Meta Ad account, added by the user, once the campaign is approved by the ad publishing platform for publishing.
How to connect Facebook with Ad Manager?
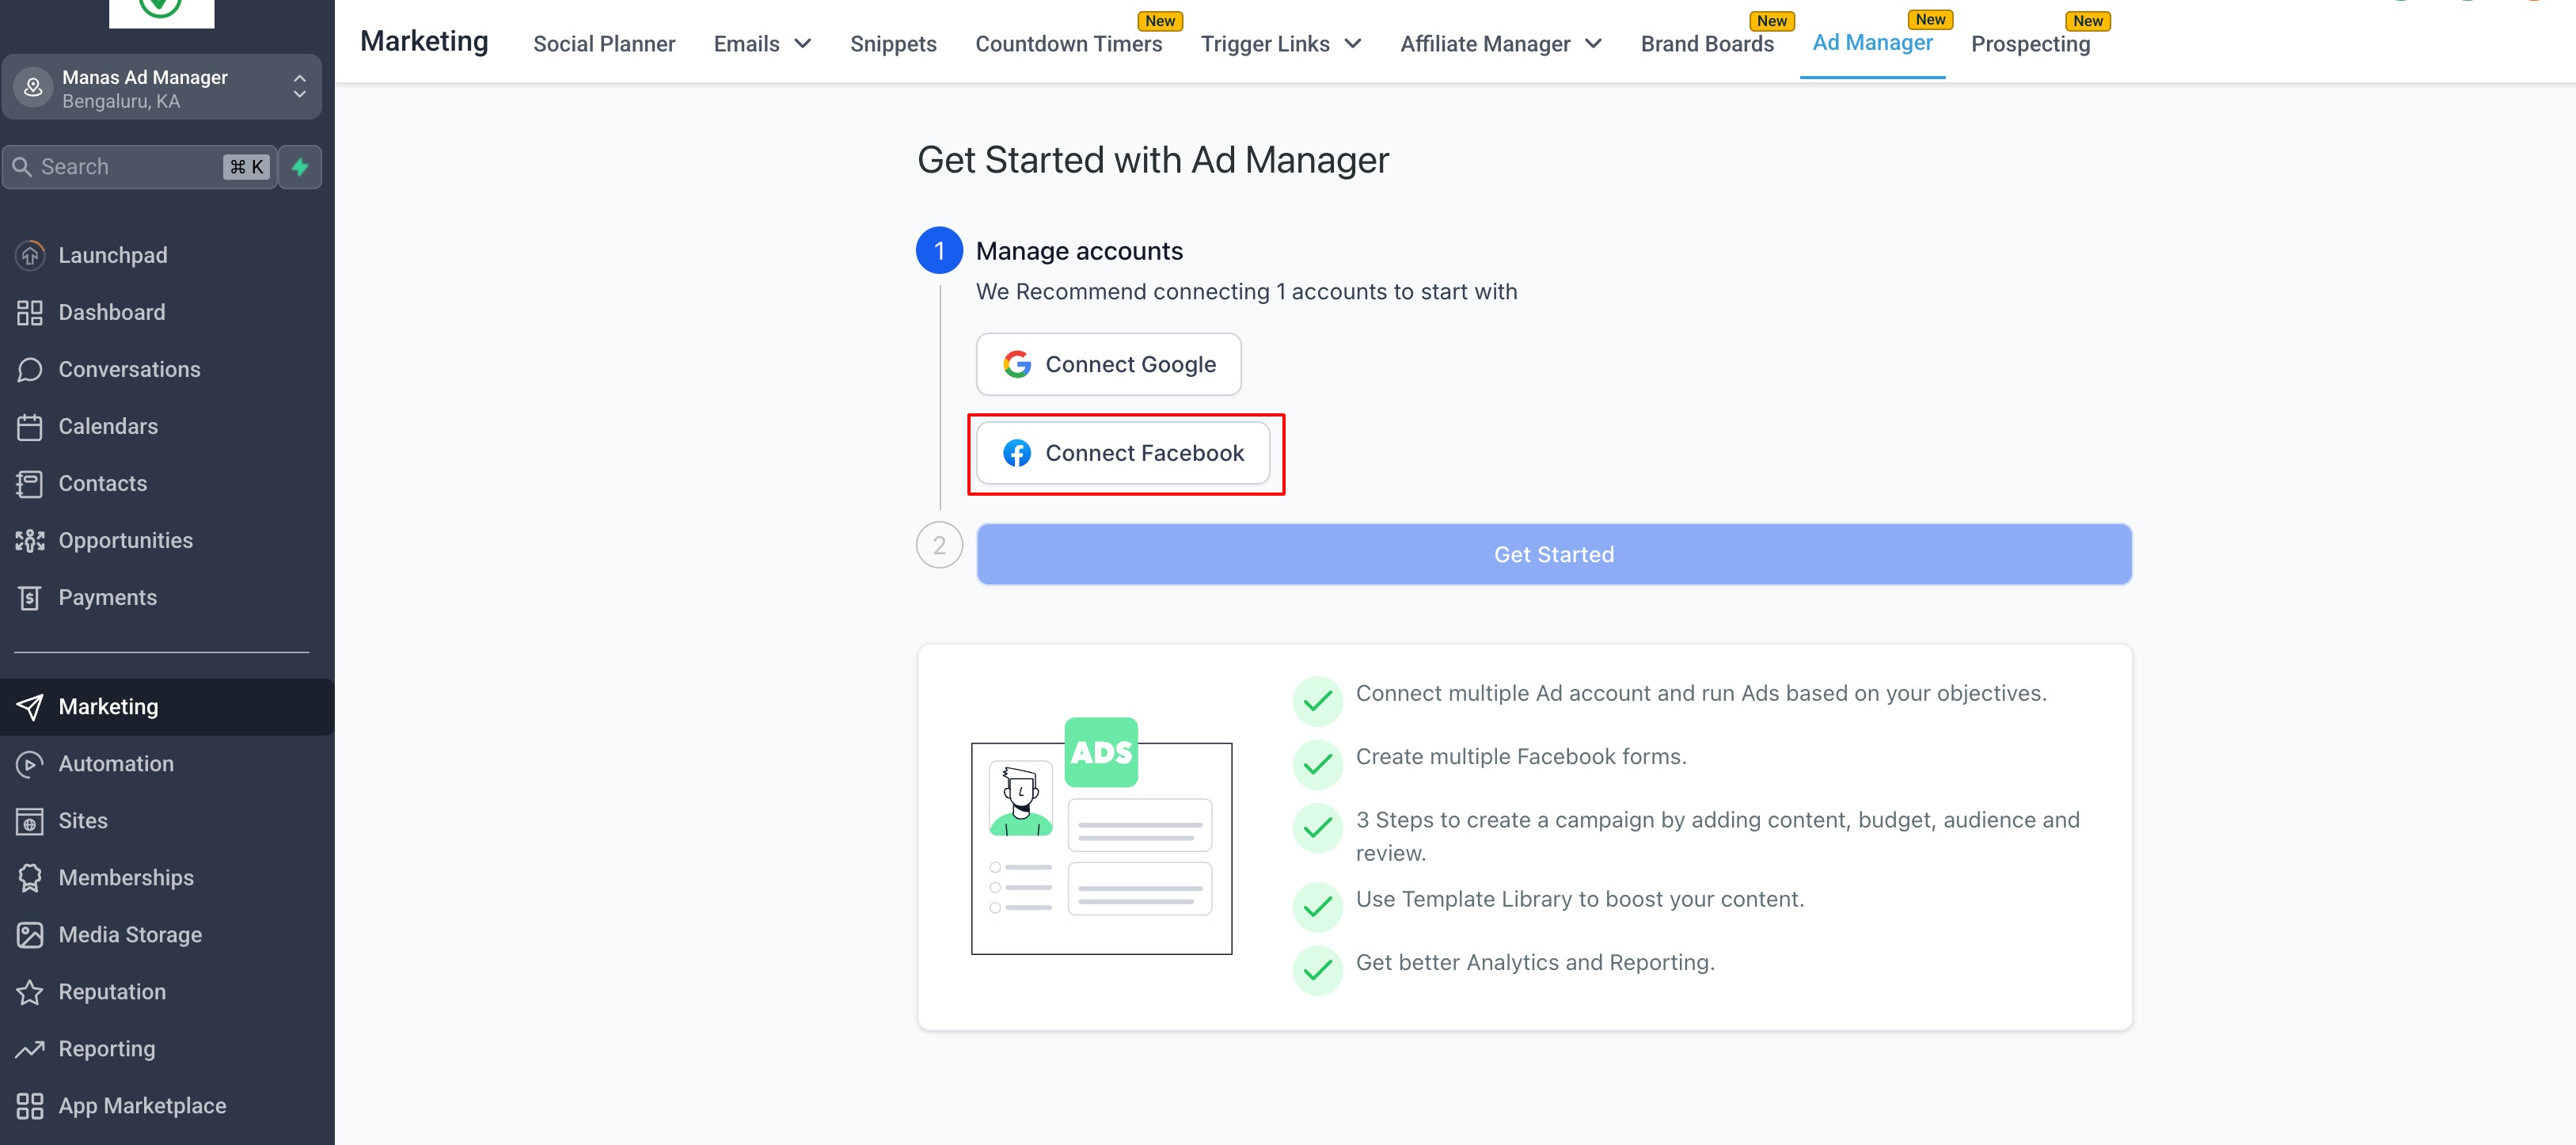
Now that the user has subscribed to use Ad Manager, connecting Facebook with Ad Manager is another essential step before the campaign journey can begin.
On clicking the "Connect Facebook" button, you will be navigated to enter your Facebook credentials and grant permissions to LeadConnector. Along with other permissions, permission to access your Business Manager will also be required.
Note: Ensure all permission toggles are enabled, and checkboxes selected to grant all the permissions to the LeadConnector app.
2. Once Facebook account is connected and all the permissions are granted, all the Meta Ad accounts which are associated with the connected Business Manager will be shown in the 'Select Ad Account' dropdown and any one of them which is eligible needs to be selected.

The eligibility of the ad account is defined by its status, and the following list details what each status means and which are suitable for connecting with Ad Manager:
Active: Fully operational; you can create and run ads without any restrictions. - Suitable to connect with Ad Manager.
Disabled: Ad account is disabled, and you cannot create or run any new ads. This status usually occurs when Facebook detects a policy violation or suspicious activity associated with your ad account. - Cannot be connected with Ad Manager.
Unsettled: You have unsettled billing with Facebook that needs to be rectified. - Suitable to connect with Ad Manager.
Pending risk review: This status indicates that your ad account is under review by Facebook's team, typically after you’ve made changes to your account information or billing details. During this period, you may have limited ability to create or edit ads. - Suitable to connect with Ad Manager.
Pending closure: This status means that your ad account is scheduled for permanent closure, often due to repeated or severe policy violations. - Suitable to connect with Ad Manager.
Closed: If your ad account has this status, it has been permanently closed by Facebook, and you cannot create or run any ads from this account. - Cannot be connected with Ad Manager.
3. The next step is to select the Facebook page from the list of pages shown that are available to be connected. Only those Facebook pages associated with the automatically connected Business Manager will be eligible. Click on 'Connect' next to the page you want to link with Ad Manager.
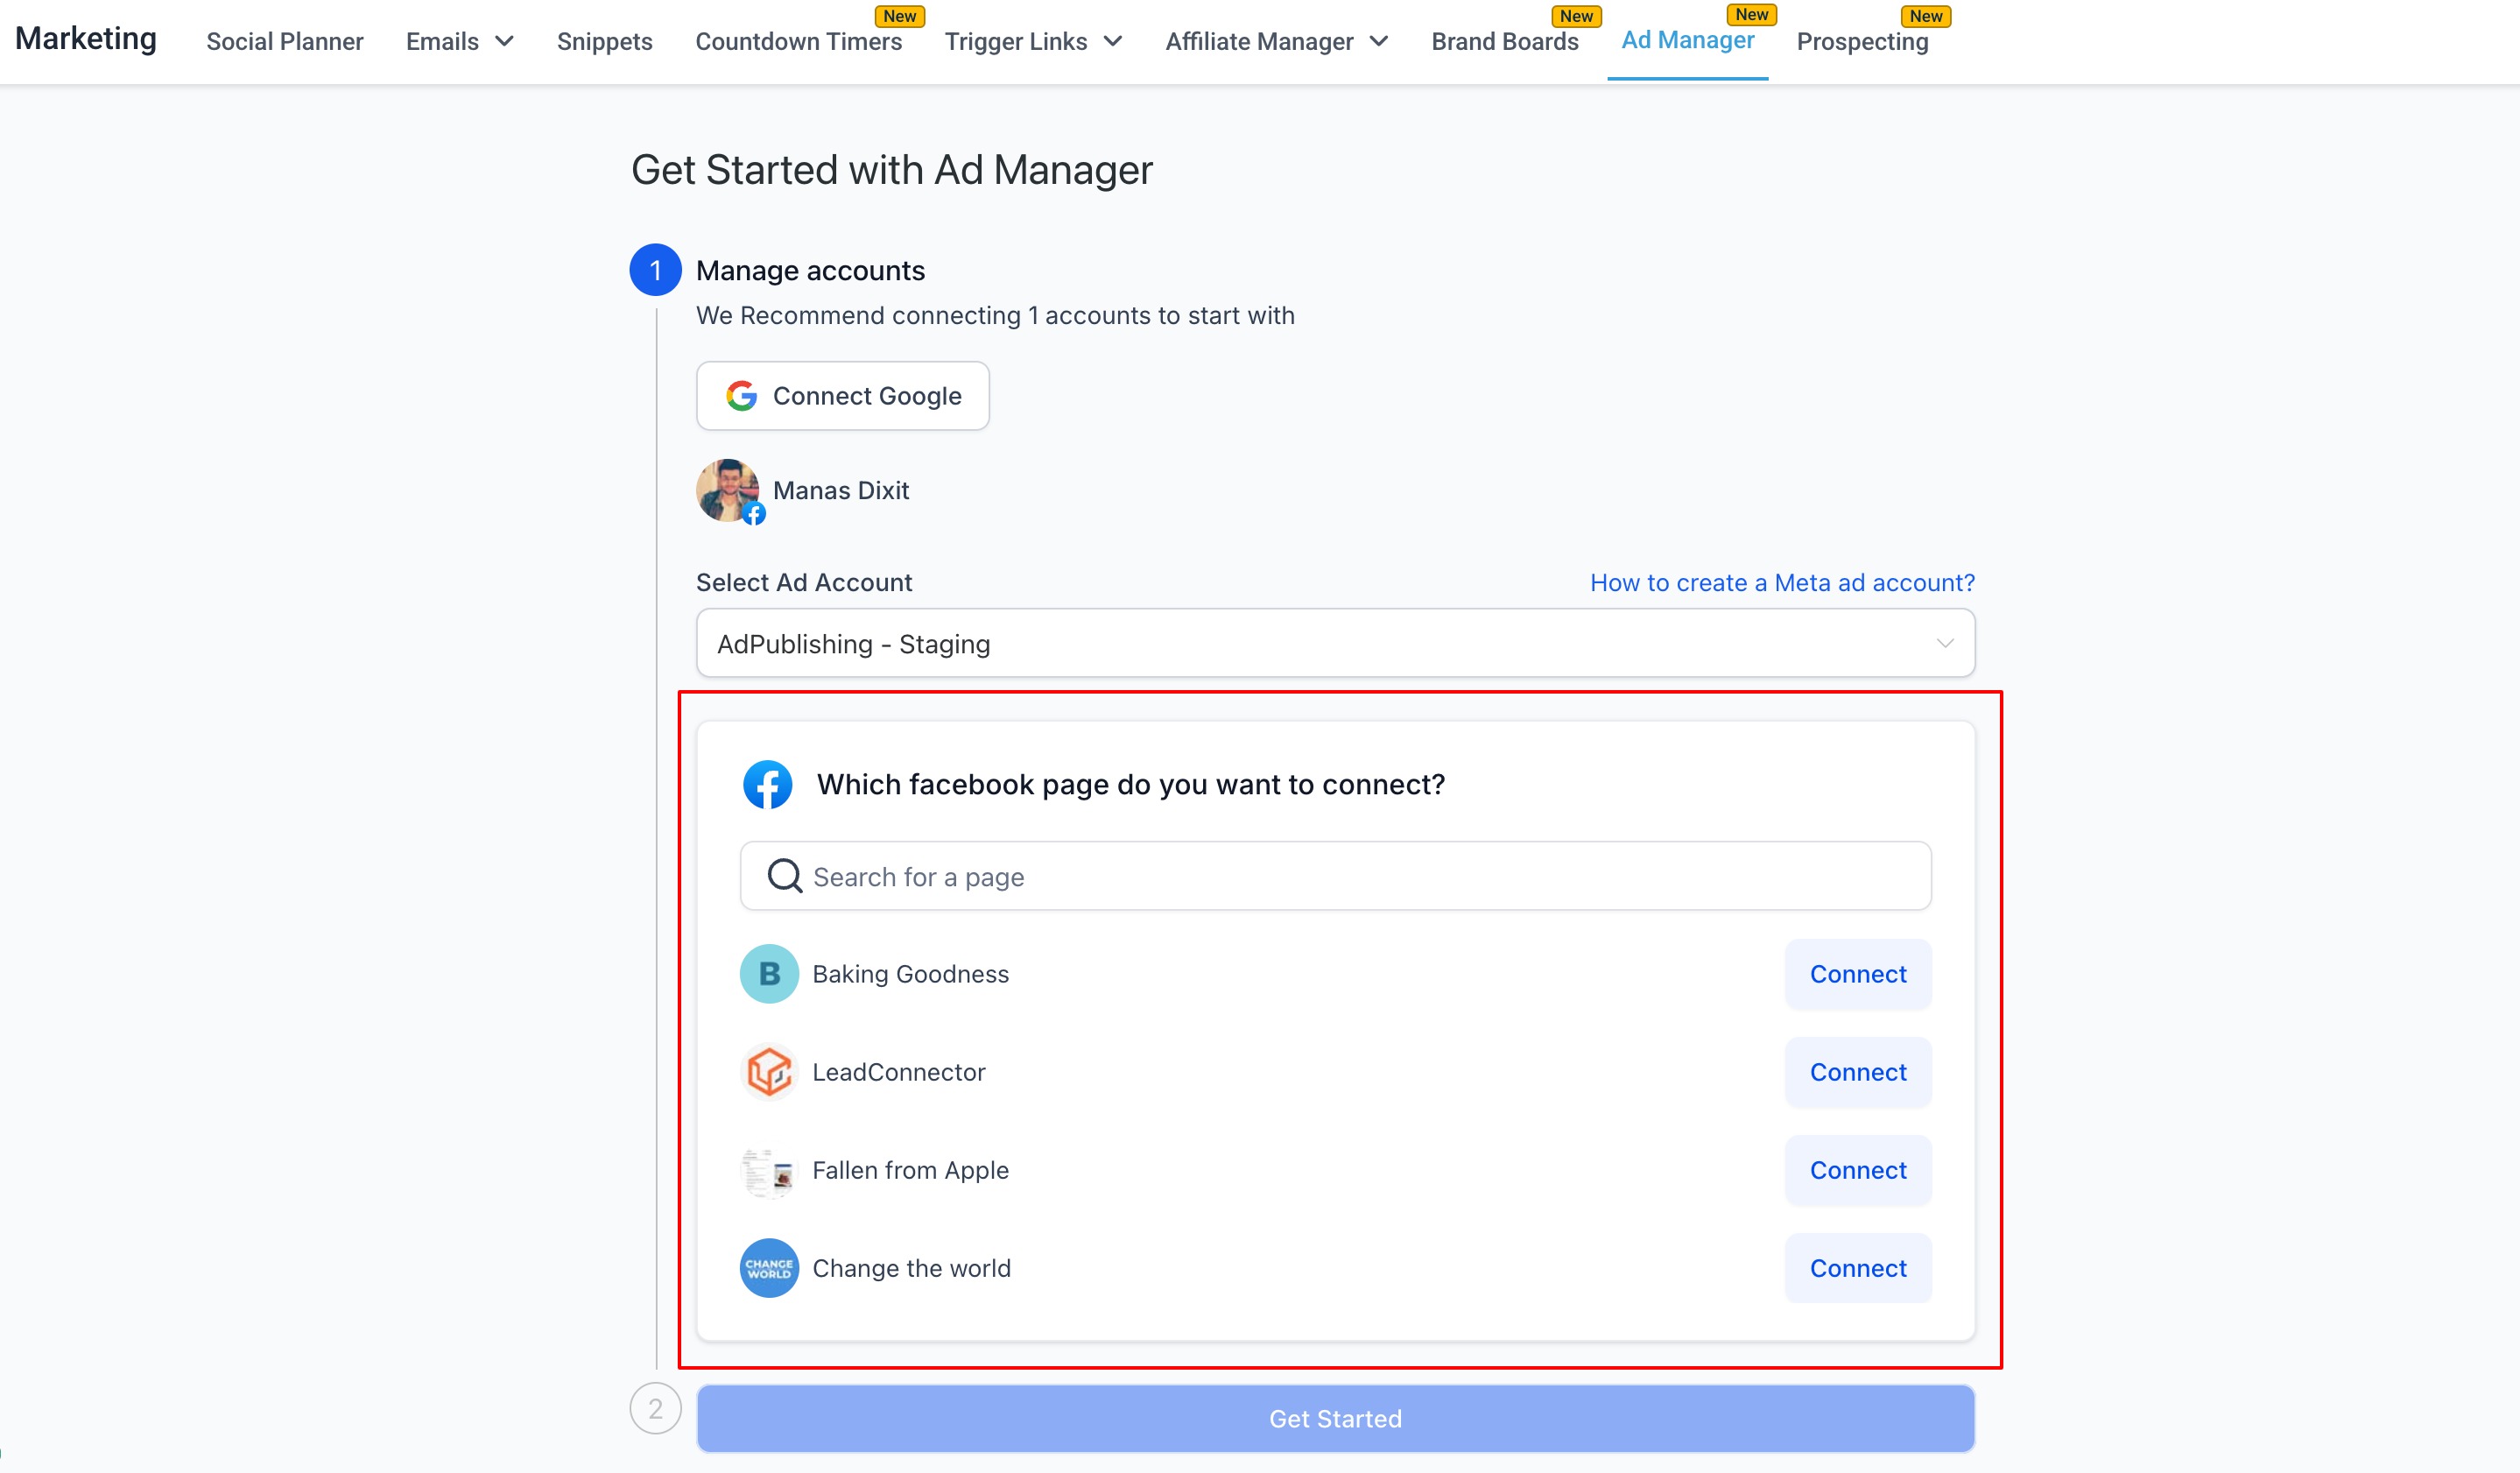
On clicking Connect, the page gets connected, and you are ready to create a campaign by clicking on 'Get Started'.
Note: One Facebook page can be connected from the onboarding flow. If you want to connect more than one, it can be done under the Ad Manager settings > Pages tab, by clicking on 'Connect Facebook page(s)'.

Was this article helpful?
That’s Great!
Thank you for your feedback
Sorry! We couldn't be helpful
Thank you for your feedback
Feedback sent
We appreciate your effort and will try to fix the article